Replace tablet screen yourself:Can you really replace a tablet screen yourself in 2026, or is it better to leave it to a professional?
Q: Can you really replace a tablet screen yourself in 2026, or is it better to leave it to a professional?
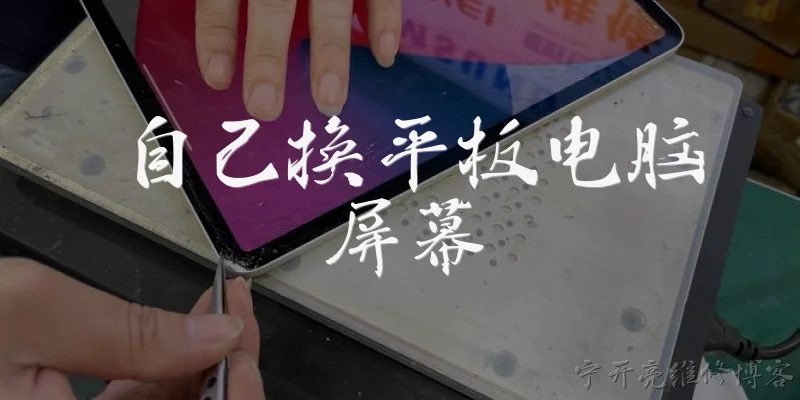
A: Yes, you can absolutely replace a tablet screen yourself in 2026, and for many popular models it has actually become easier thanks to improved repair kits and detailed video guides. The key factor is your specific tablet: iPads still require careful heating and adhesive management, while many Android tablets use simpler clip-and-screw assemblies. Before starting, check whether your device uses a fused display assembly, since these cost more but reduce the risk of dust contamination. You will need a heat mat or hairdryer, plastic pry tools, suction cups, and a precision screwdriver set. Budget roughly 60 to 120 minutes for a first attempt. The main risks are cracking the new panel during installation and damaging ribbon cables, so work slowly and keep screws organized. If your tablet is still under warranty, self-repair may void it, though right-to-repair laws in the EU and several US states now require manufacturers to supply parts and manuals. For most people with basic patience and steady hands, a DIY screen replacement is a rewarding and money-saving project.
Q: What tools and replacement parts do I need to replace a tablet screen myself in 2026?
A: In 2026, a solid DIY tablet screen replacement kit includes a precision screwdriver set with pentalobe and tri-point bits, plastic opening picks, a suction cup, tweezers, a heat gun or microwaveable heat pack, and adhesive strips or B-7000 glue. You will also want anti-static wrist straps and a magnetic screw mat to avoid losing tiny fasteners. For the part itself, buy from a reputable supplier that specifies whether the screen is OEM, refurbished, or aftermarket, and confirm it includes the digitizer and LCD as a single assembly if your tablet uses a fused design. Many 2026 kits now ship with pre-applied adhesive and a frame, which dramatically simplifies alignment. Prices range from about 40 to 200 dollars depending on the model. Don't forget screen protectors and dust plugs for the final steps. Some manufacturers, including Samsung and Lenovo, now sell official self-repair kits through partner programs. Always verify the part number against your exact model, because a screen that looks identical can have different connector layouts. Investing in quality tools pays off, especially if you plan to repair more than one device.
Q: What are the biggest mistakes people make when replacing a tablet screen themselves?
A: The most common mistake is applying too much heat or prying too aggressively, which cracks the glass or damages the LCD underneath. In 2026, thin tablets have even tighter tolerances, so overheating the battery is a real safety concern, so never exceed the manufacturer's recommended temperature and watch for battery swelling. Another frequent error is skipping the battery disconnect: always power down and unplug the battery before touching ribbon cables, or you risk shorting the board. People also forget to transfer small parts like the front camera bracket, proximity sensor gasket, and speaker mesh from the old screen to the new one. Dust and fingerprints trapped under the glass are frustrating, so work in a clean, steamy bathroom or use an anti-static dust-free box. Finally, many DIYers reuse worn adhesive, leading to a lifted screen later. Use fresh adhesive strips or glue and clamp the screen overnight. If the touchscreen or display behaves oddly after assembly, reseat the connectors before assuming the part is faulty. Following a model-specific video guide step by step prevents most of these issues.
Dialogue about
Common scenarios of "Replace tablet screen yourself"
【Alex】 Hey Jamie, my tablet screen is cracked. I'm thinking of replacing it myself to save money. Any advice?
【Jamie】 Hi Alex! That's a bold move. I've done it before. First, what tablet model do you have?
【Alex】 It's an iPad Air 4th generation. I've watched a few videos, but I'm nervous.
【Jamie】 That's a decent one to start with. You'll need a replacement screen, tools like a heat gun or iOpener, suction cups, plastic picks, and screwdrivers.
【Alex】 I have some tools from a phone repair kit. Will those work?
【Jamie】 Maybe, but you need specific sizes. For iPad Air 4, you'll need pentalobe and Phillips screwdrivers. Also, the adhesive is strong, so a heat source is crucial.
【Alex】 I see. Where did you buy your replacement screen?
【Jamie】 I got mine from iFixit. They have quality parts and detailed guides. But you can also find them on Amazon or eBay. Just make sure it's OEM or high-quality aftermarket.
【Alex】 Okay, I'll check iFixit. What's the hardest part of the process?
【Jamie】 Removing the old screen without damaging the LCD or the frame. You have to be patient with the heat and picks. Also, be careful with the home button and display cables.
【Alex】 I'm worried about breaking the new screen during installation. Any tips?
【Jamie】 Test the new screen before sealing it. Connect it loosely and power on to ensure it works. Then apply new adhesive and carefully place it.
【Alex】 That makes sense. Do I need to transfer anything from the old screen?
【Jamie】 If your replacement doesn't come with a home button, you'll need to transfer the original home button to keep Touch ID working. That's tricky because it's paired to the logic board.
【Alex】 Oh, I didn't know that. So I should buy a screen with a home button already?
【Jamie】 Yes, if you want Touch ID to work. Otherwise, you'll lose that feature. Some aftermarket screens have a home button, but it might not support Touch ID.
【Alex】 Good to know. How long did it take you?
【Jamie】 About 2 hours, but I took my time. First-timers might take longer. Just follow a step-by-step guide and pause if you get stuck.
【Alex】 Thanks, Jamie. I feel more confident now. I'll order the parts and give it a shot.
【Jamie】 You're welcome! Good luck, and let me know if you need help. Remember to back up your data first!